
Fixing scratches and scuffs on Nubuck boots
M
Muhammad Imran
•I hope you enjoy this post. My team and I can help showcase your expertise like this. Let's talk.
A craftsman's guide to repairing nubuck leather, from surface scuffs to deep gouges. Learn the techniques for fiber manipulation, abrasion control, and surgical adhesive application to restore your boots.
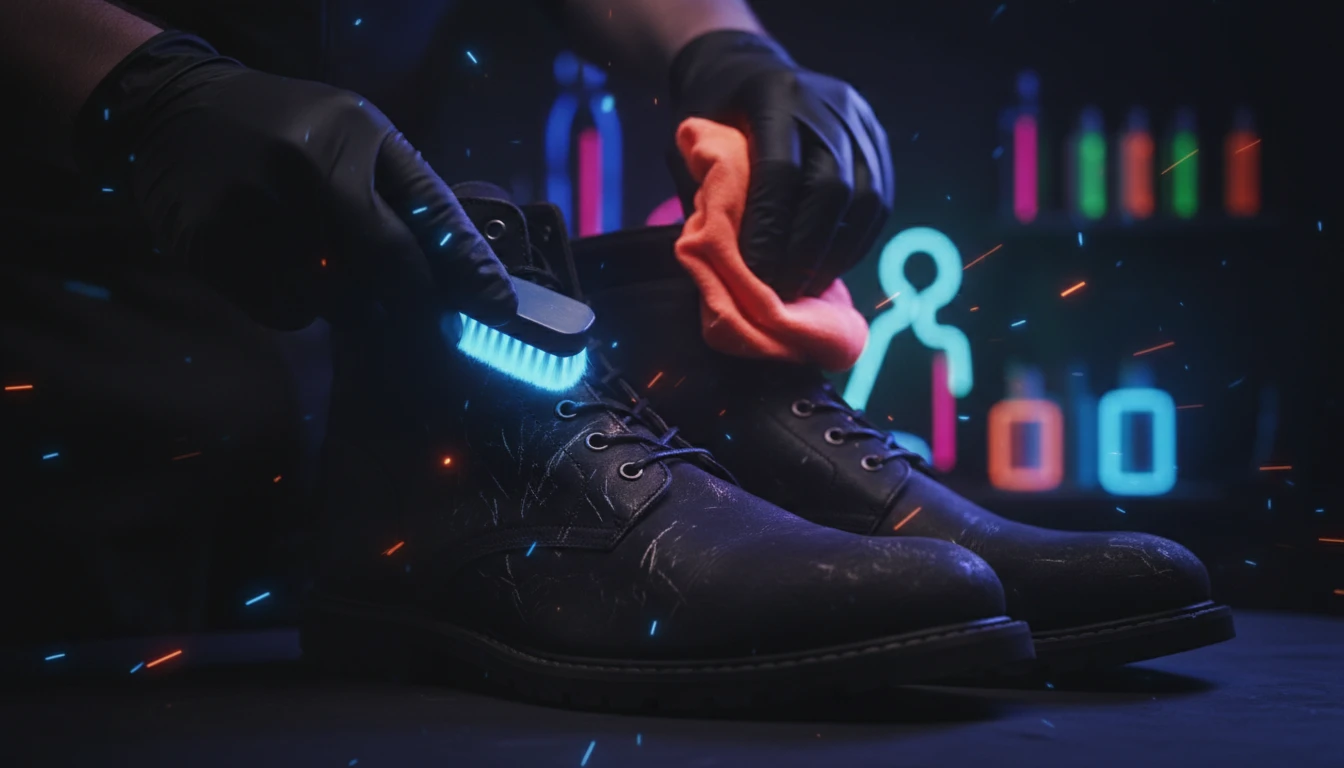
Fixing Scratches and Scuffs on Nubuck Boots <p>There is a specific, sinking feeling that every leather enthusiast knows. You are wearing your pristine timberlands or that velvety jacket, and gravity betrays you. A slice of pizza drips, a mechanic’s tool slips, or a salad fork goes rogue. You watch, helpless, as a dark, wet spot blooms instantly on the surface. Unlike smooth leather, where you might have a grace period to wipe it away, nubuck drinks it in. It gulps it.</p><p>Panic is your enemy here. Action is your ally. But it must be the <em>right</em> action.</p> <p>I have spent decades working with hides, and I can tell you that oil on nubuck is the ultimate stress test for leather care. It is not just surface dirt; it is a chemical bond forming between the foreign lipid and the leather fiber. If you attack it with water and aggressive scrubbing, you will set the stain permanently and ruin the nap. If you wait too long, the oil oxidizes and becomes part of the shoe.</p><p>This guide is your triage station. We are going to look at the physics of extraction, the chemistry of absorbents, and the mechanical restoration of the nap. Before we pick up a tool, I strongly suggest you ground yourself in the fundamentals by reading <a href="/posts/the-ultimate-master-guide-to-nubuck-leather-characteristics-care-and-comparisons">the ultimate master guide to nubuck leather characteristics, care, and comparisons</a>. Understanding what you are working on is half the battle.</p> Assessing the Damage: Surface vs. Deep Scratch <p>Diagnosis is the precursor to cure. In the workshop, we categorize damage into two distinct tiers: <strong>nap displacement (scuffs)</strong> and <strong>structural severance (scratches/gouges)</strong>. Treating a deep gouge like a surface scuff will result in a permanent scar, while treating a scuff with the aggressive methods required for a gouge will ruin the surrounding nap.</p><h3>The Physiology of a Scuff</h3><p>A 'scuff' on nubuck is rarely actual damage to the skin. Instead, it is usually the matting down of the protein fibers (the nap) or the transfer of a foreign material (rubber, asphalt, paint) onto the fiber tips. The visual 'scratch' is actually a difference in light refraction. The matted fibers reflect light differently than the standing fibers. If the leather is intact but the texture is flat, you are dealing with a surface abrasion.</p> <h3>The Anatomy of a Deep Gouge</h3><p>Real damage occurs when an object cuts through the sanded surface and slices into the corium. You will see a flap of leather, a distinct color change (usually lighter), or a fibrous fraying that looks like a raw wound. This compromises the water resistance and structural integrity of the boot. If you are unsure if your boots are durable enough for the abuse you are throwing at them, it might be worth reviewing <a href="/posts/nubuck-vs-full-grain-leather-which-is-better-for-boots">the durability analysis of nubuck vs. full grain leather for boots</a>.</p><p><strong>Diagnostic Test:</strong> Run a clean finger against the grain over the mark. If the mark disappears or shifts color, it is a scuff. If your fingernail catches on a ridge, it is a deep scratch.</p> The Eraser Method for Light Scuffs <p>For 90% of the marks you encounter, a specialized <strong>gum eraser</strong> or a crepe rubber block is the primary tool. We are not erasing pencil lead here; we are using friction and heat to lift foreign matter and separate matted fibers.</p><h3>The Mechanics of Friction Cleaning</h3><p>The goal is to generate enough heat through friction to make the rubber slightly tacky. This tackiness grabs onto the dirt or transfer mark and pulls it away from the leather, while the mechanical action agitates the nap back into an upright position. This is the first step in any <a href="/posts/how-to-clean-nubuck-leather-shoes-a-step-by-step-guide">comprehensive step-by-step cleaning guide for nubuck shoes</a>.</p> <h3>Technique Execution</h3><ol><li><strong>Dry Surface Only:</strong> Never attempt this on wet leather. The fibers are swollen and weak when wet; rubbing them will cause them to pill and tear.</li><li><strong>Spot Testing:</strong> Use the eraser on the tongue or heel counter first to ensure it doesn't leave a residue.</li><li><strong>The Approach:</strong> Apply moderate pressure and rub the eraser back and forth over the scuff. Do not go in circles yet. You want to attack the scuff perpendicular to the direction of the mark.</li><li><strong>Debris Management:</strong> The eraser will crumble. This is good—it means it is shedding the dirty rubber. Blow away the crumbs frequently (do not wipe them with your hand, as your skin oils will transfer).</li></ol><p>If the mark is stubborn, increase the pressure slightly. You are trying to achieve <strong>scuff removal</strong> without burnishing the leather smooth. If the area starts to look shiny, stop immediately—you are overheating the leather and collapsing the nap.</p> Brushing Out the Nap to Hide Marks <p>Once the foreign material is removed or the fibers are unclumped via the eraser, the area will look chaotic. The nap is pointing in various directions, creating a visual blotch. You need to perform <strong>nap realignment</strong>.</p><h3>Tool Selection: Nylon vs. Brass</h3><p>For general maintenance, a <strong>nylon brush</strong> is preferred. It is stiff enough to move the fibers but soft enough not to scratch the surface. However, for restoring the nap after a scratch repair, you may need a brass wire brush. Use extreme caution. Brass is harder than leather. It is used to 'scarify' the surface—literally scratching it intentionally to create new nap.</p> <h3>Directional Brushing Strategy</h3><ul><li><strong>The Lift:</strong> Brush against the grain (back and forth) using short, flicking motions. Think of it as trying to flick dust out of a carpet. This lifts the fibers.</li><li><strong>The Set:</strong> Once the nap is lifted and the scuff is blended, brush the entire boot in one uniform direction (usually front to back) to set the nap. This creates that uniform, velvety sheen.</li></ul><p>If you find that brushing alone isn't restoring the look, you might be dealing with contamination that requires deeper intervention. Consult the emergency guide on <a href="/posts/removing-oil-and-grease-stains-from-nubuck-emergency-guide">removing oil and grease stains from nubuck</a> if the 'scuff' appears dark and oily.</p> Using a Leather Glue for Flaps <p>When you snag your boot on a jagged rock or a piece of rebar, you may end up with a 'flap'—a slice of leather that is still attached but peeling away. Do not cut this off. You need to perform a surgical reattachment using a flexible <strong>leather adhesive</strong>.</p><p><strong>Warning:</strong> Do not use cyanoacrylate (Super Glue). It dries hard and brittle. When the leather flexes, the glue will crack, tearing the leather further. You need a water-based contact cement or a specialized urethane leather glue that remains flexible.</p> <h3>The Surgical Procedure</h3><p><strong>Tools Required:</strong><ul><li>Flexible leather adhesive (clear drying)</li><li>A toothpick or sewing needle</li><li>Tweezers</li><li>Wax paper</li></ul><strong>Step-by-Step:</strong><ol><li><strong>Clean the Wound:</strong> Use a puff of air or a dry brush to ensure no dirt is trapped under the flap.</li><li><strong>Apply Adhesive:</strong> Squeeze a tiny drop of glue onto a piece of scrap paper. Dip the tip of the toothpick into the glue.</li><li><strong>Insert:</strong> Gently lift the flap with tweezers and apply the glue to the <em>underside</em> of the flap and the crater of the scratch. Do not over-apply.</li><li><strong>Tack Time:</strong> If using contact cement, let it dry for 5-10 minutes until tacky. If using urethane, you can usually bond immediately.</li><li><strong>Compression:</strong> Press the flap down firmly. Use the back of the tweezers or a smooth spoon to apply pressure for at least 60 seconds.</li><li><strong>Feathering:</strong> If any glue oozes out, let it dry until it becomes rubbery, then gently rub it off with your finger.</li></ol> When to Use Sandpaper (Cautiously) <p>This is the nuclear option. Sanding removes material. However, since nubuck is created by sanding top-grain leather, using <strong>fine grit sandpaper</strong> is essentially repeating the manufacturing process on a micro-scale. To understand why this works (and the risks involved), it is helpful to understand <a href="/posts/the-tanning-process-how-nubuck-is-made-from-top-grain">how nubuck is made from top-grain leather</a>.</p><h3>Grit Selection is Critical</h3><p>Never go below 600 grit. Standard carpentry sandpaper (80, 120, 220 grit) will destroy your boots.<ul><li><strong>600 Grit:</strong> For leveling out glued flaps or severe scratches.</li><li><strong>800-1000 Grit:</strong> For blending and restoring the velvety texture.</li></ul></p> <h3>The Feathering Technique</h3><ol><li>Take a small piece of sandpaper (fold it for rigidity).</li><li>Gently sand the repaired area in a circular motion. Use practically zero pressure—let the grit do the work.</li><li>As you sand, the leather will lighten significantly. This is normal; you are exposing fresh, un-oiled fibers.</li><li>Expand your circles slightly to blend the repair into the surrounding leather.</li><li>Blow away the dust. The texture should now match the surrounding nap, though the color will likely be lighter.</li></ol><p>This technique is effectively <strong>surface abrasion</strong> control. You are sacrificing a microscopic layer of leather to regain a uniform texture.</p> Color Matching and Dyeing Scratched Areas <p>After gluing and sanding, you are often left with a repair that is structurally sound but visually obvious because it is lighter than the rest of the boot. You need <strong>color restoration</strong>.</p><p>Nubuck is difficult to spot-dye because of its absorbency. A drop of dye will spread rapidly (wicking) and create a dark spot.</p> <h3>Restoration Strategy</h3><p><strong>1. The Conditioner Method (for minor fading):</strong> Often, the 'white' scratch is just dry leather. Applying a specific nubuck conditioner (often spray-based) can darken the fibers back to match the original tone.</p><p><strong>2. The Spray Dye Method:</strong> If the color loss is significant, use a renovating spray matched to your boot's color.<ul><li>Mask off the sole and hardware.</li><li>Do not spray directly on the scratch from close range. Spray a mist from 12 inches away.</li><li>Build up coats slowly.</li></ul></p><p><strong>3. The Dilution Method (Expert):</strong> If you must use liquid dye, dilute it by 50%. Apply it with a 000-sized paintbrush, touching only the center of the scratch and letting it wick outward. For a deep dive into reviving lost hues, refer to the guide on <a href="/posts/restoring-faded-nubuck-dyeing-and-reviving-color">restoring faded nubuck and dyeing techniques</a>.</p> Preventing Future Damage <p>You have successfully performed surgery on your boots. The flap is glued, the nap is sanded, and the color is blended. Now, how do we stop this from happening next week?</p><p>Nubuck requires a proactive defense shield. Because it lacks the protective smooth surface of standard leather, it is porous and prone to snagging. Your <strong>boot care kit</strong> must include a high-quality water and stain repellent.</p> <h3>Waterproofing as Armor</h3><p>A good waterproofing spray doesn't just repel rain; it creates a microscopic coating on the fibers that reduces friction. When something scrapes your boot, it is more likely to slide off the treated fibers than to dig in and tear them. However, not all sprays are created equal. You need to choose the right product, which you can research in our article on <a href="/posts/can-you-waterproof-nubuck-best-sprays-and-techniques">the best sprays and techniques for waterproofing nubuck</a>.</p><h3>Routine Maintenance</h3><p>The accumulation of dust acts as an abrasive. Every time you flex your foot, dust particles grind against the fibers, weakening them and making them more susceptible to deep scratches. A simple daily ritual of brushing your boots with a nylon brush will extend their life significantly.</p>